New Unity 2019 2D Sprite Rigging and Lighting Tools
With the latest 2019.1 update Unity team have seriously upgraded the 2D tool-set of the editor:
Seems like a lot of those tools were inspired by the Rayman Legends engine. Something I was drooling over 5 years ago, hoping one day Unity would implement some of those. And they finally did!
It really makes me all warm and fuzzy inside, remembering how most of those automated 2D tools and thingies were not available when I was working on Run and Rock-it Kristie in the freeware version of Unity 4 (which back then lacked even the Sprite packaging functionality!) and had to be either developed from scratch or achieved with some cool Asset Store stuff you would need to purchase and integrate into your product.

Oh, the tools... The tools...
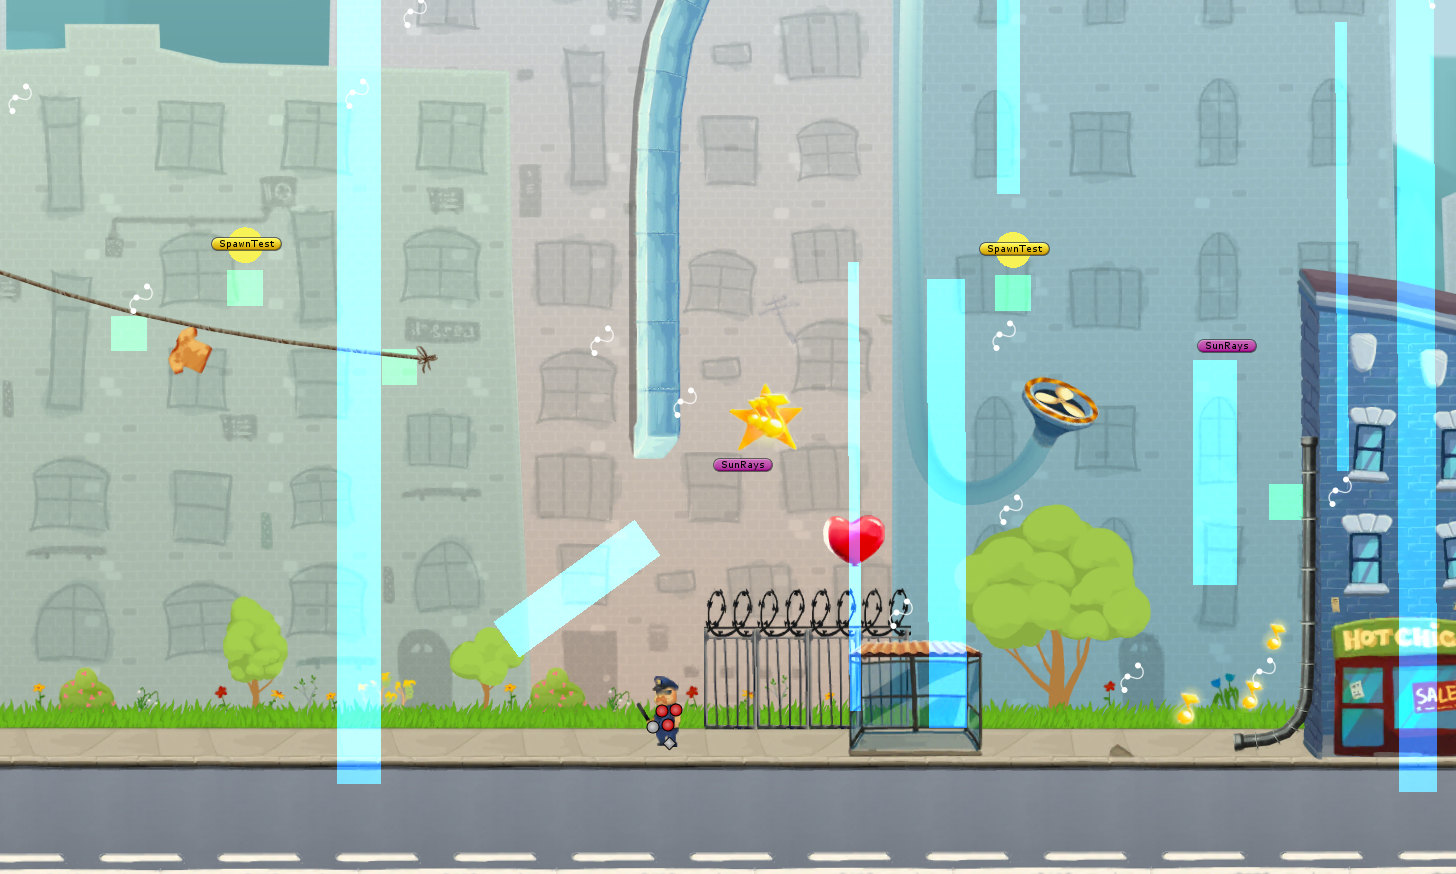
IK and rigging with bone weighting? Check:
Manual sprite atlasing and set-up? Check (atlasing is vital for mesh batching and draw call reduction):
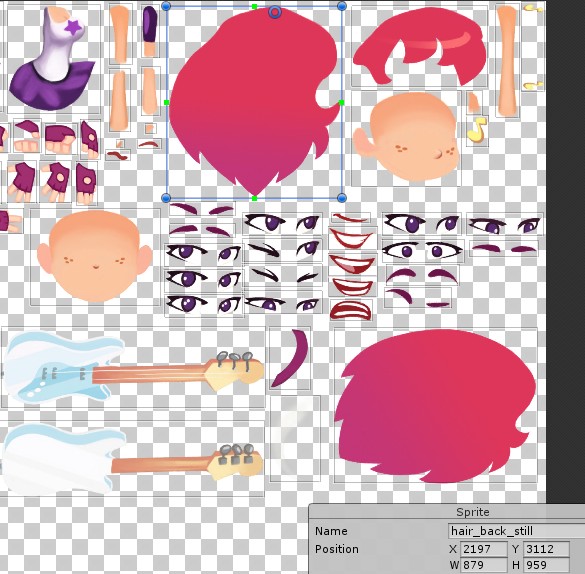
Sprite assembly and animation? Check:
Dynamic level-building tools? Check (with a modded version of the Ferr2D asset):
Dynamic lighting? Check! — With up to 4 live vertex lights and camera-distance based light culling to make sure the game would run at stable 60 fps on iPhone 4 (heavily reliant on the amazing but now deprecated Core Framework asset by echoLogin):
It was... Fun!
You know what I also remember? I remember almost every day working on the game I felt excited and driven. It was FUN. Even when it was challenging to solve some technical issues (there were a lot of those, especially for a beginner) or work around Unity limitations or bugs, it felt truly rewarding and would give such a powerful motivation boost that I would continue working until the end.
Until the release.

But the "serious" CG movie stuff I'm doing now?.. Honestly? Meh. It's so slow and clunky compared to my previous game development experience. Everything needs to be either cached, or rendered... I'm also having some grave issues with hair simulation which I wasn't able to overcome for the last 6+ months, many operations in the "classic" world of 3D editors are still either single-threaded, unstable, or require some very specific knowledge or particular and elaborate set-up... It's almost no fun! No fun means much, much less motivation to continue.
It's a problem.

Therefore this July I will instead be checking out the latest Unity Engine and see whether most of what I'm doing right now could be ported into Unity. Starting with simulation and scene assembly and hopefully — ending up animating, rendering and applying post effects right within the Unity Editor where everything is real-time and fun! I miss the real-time aspect! Oh boy, do I miss the ability to tweak materials and see the more or less finalized render of the scene even during assembly. The ability to import assets and build "smart" prefabs (like Softimage Models, but with interactivity and intrinsic scene-aware scripting via MonoBehavior) e.t.c...
I miss you, Unity!
Dynamic Sloshing Liquid Rig. Making It Look Like a Simulation With Nothing but the Awesome Power of Math. Part 1: The Basic Rig
Check this out:
Looks delicious, doesn't it?
What you see here is not a result of a fluid simulation. It's a combination of Linear Algebra and some neat mesh manipulation tricks to make the surface deform and behave as if it were a small body of water in a container reacting to being thrown around a scene, sloshing and splashing back and fourth.
This is what you call a rig. A "sloshing liquid rig" as I decided to name it. Intended to be used in a couple of scenes of the animated short film I'm working on.
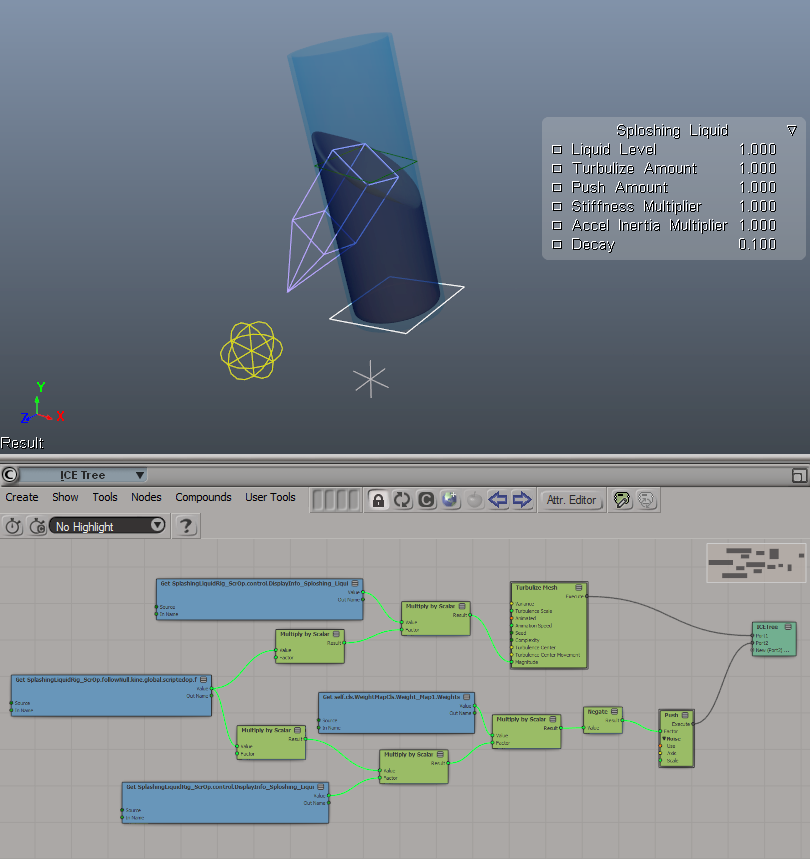
This bad boy will save me so much time when I get to animating liquids for background objects.
Let's now dive in and see what's happening under the hood. There's some math involved, but be not afraid: as always, I will try to make it as entertaining as possible and visualize everything along the way.
Perception Neuron Inertial Motion Capture vs Optical Mocap Systems and the First Production Motion Capture Session Experience
Well, the first motion capture session is over and I finally managed to find time to write a post about this exciting experience. The video of the process is still in progress and I will probably be able to post it after finalizing the 4-th and final redaction of the previz.
Or not, since it's getting more and more difficult to find time for logging. Go figure.
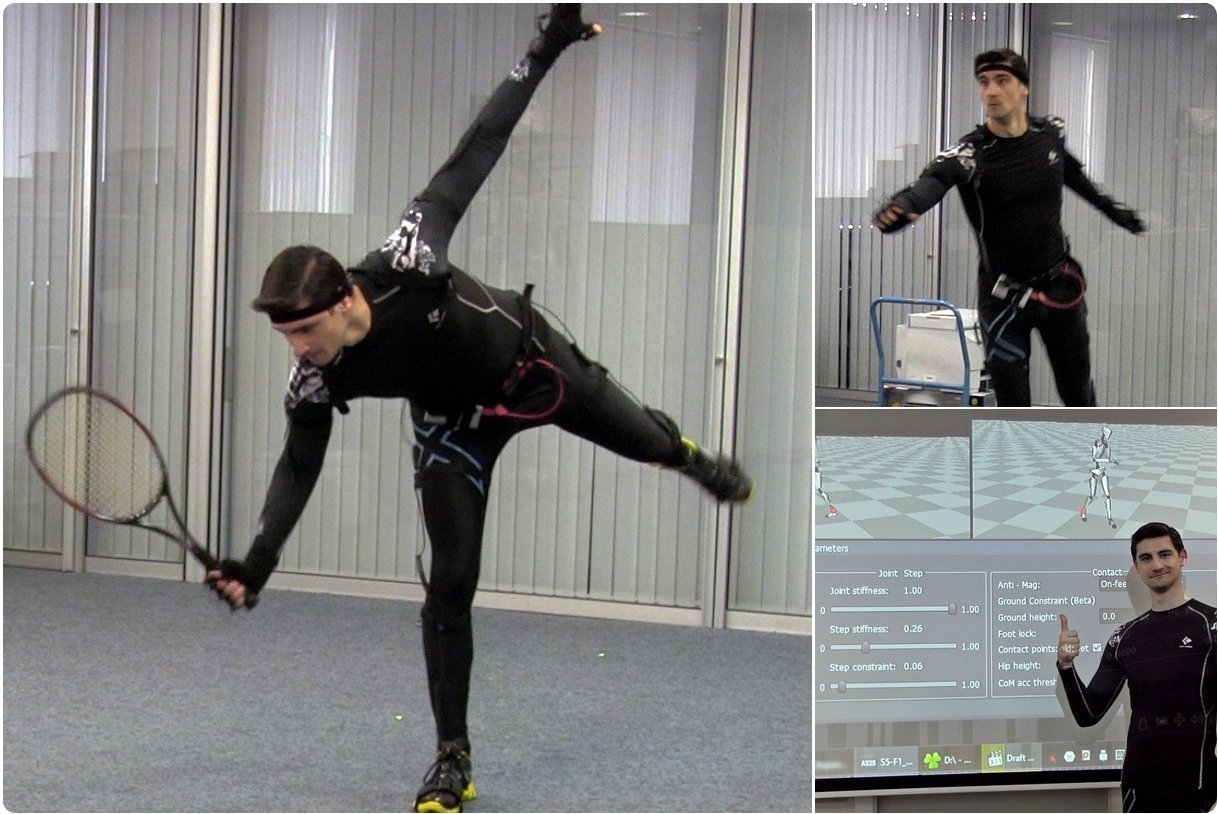
Hence today I'll mostly talk nonsense about the differences between optical and inertial motion capture systems and what pros and cons the latter can have in comparison with traditional optical systems like Optitrack. It's something I had to study before investing into the full inertial Neuron MoCap kit to make sure I'd get the most bang for buck when recording action sources for the film.
Optical tracking systems
Pretty sure you're familiar with those "classic" motion capture markers used by cameras and specialized software to track each marker's spacial data for transferring calculated translation onto 3D objects or skeletons. If not, here's an excellent article at Engadget to get you up to speed.
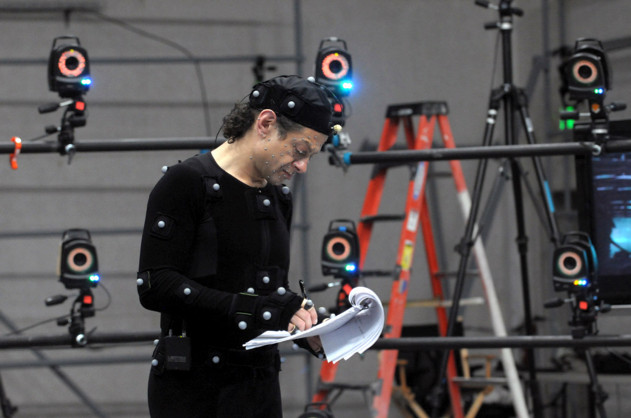 Looking good, Mr. Serkis!
Among optical MoCap solutions OptiTrack is arguably one of the better known ones. Guys at OT aim at providing the most affordable optical MoCap cameras and gear. Here's the simplest set-up one would need to capture motion using an optical MoCap system:
Getting Ready for the First Production Mocap Session and Some Motion Capture Examples
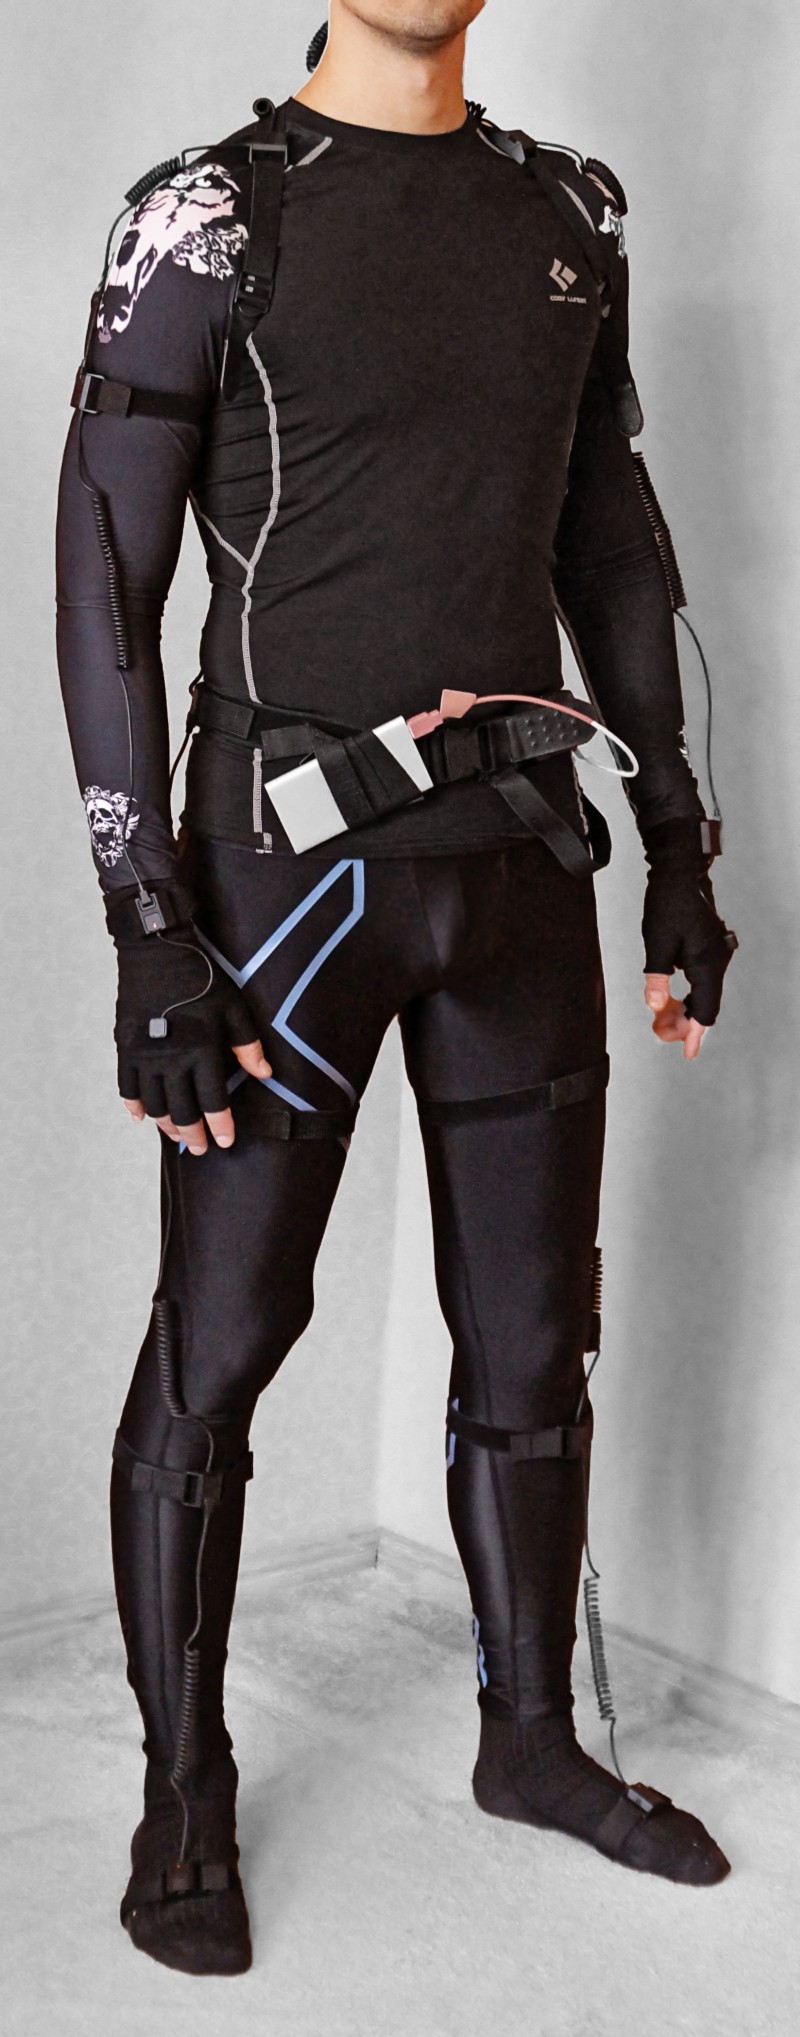
I've been quite busy playing with the Perception Neuron 32-sensor Motion Capture kit recently. Long story short, it's an amazing affordable inertial full-body MoCap solution which can produce seriously impressive captures (some amateur examples below). By affordable I mean really affordable, since the only rival that comes to mind is the Xsens MVN suit which has a starting price of about $12,000. You can now clearly understand why I was so excited to receive my very own complete inertial MoCap suit for a fraction of the price of Xsens.
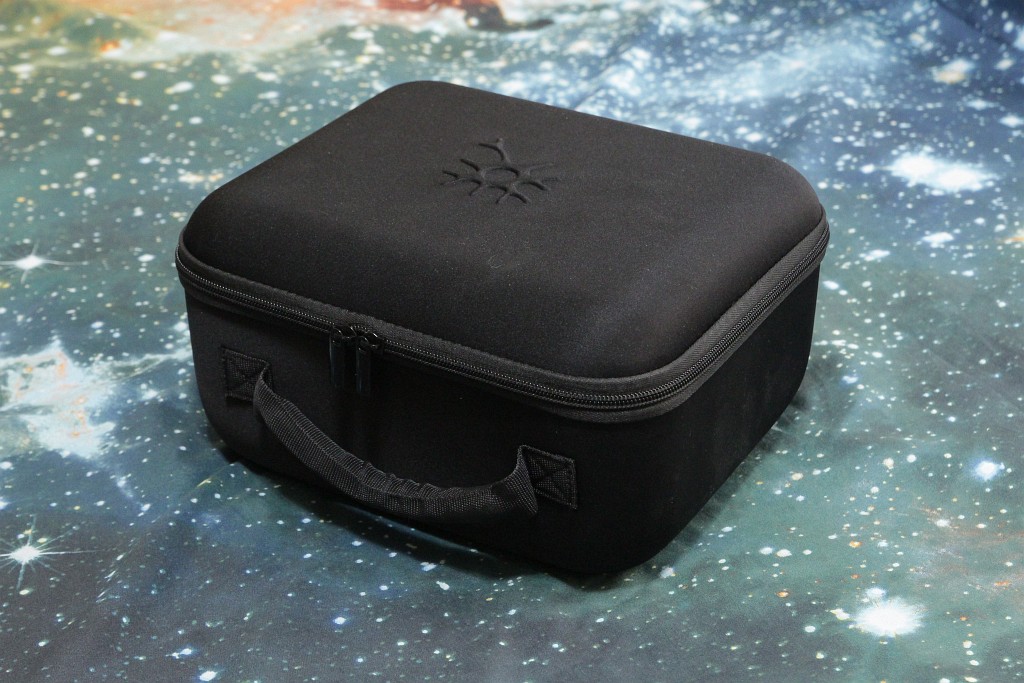
I received it about a week ago (not long after I reviewed the 6-neuron Lite kit) and still can't stop wondering how NOITOM team were able to achieve such level of performance with such democratic pricing.
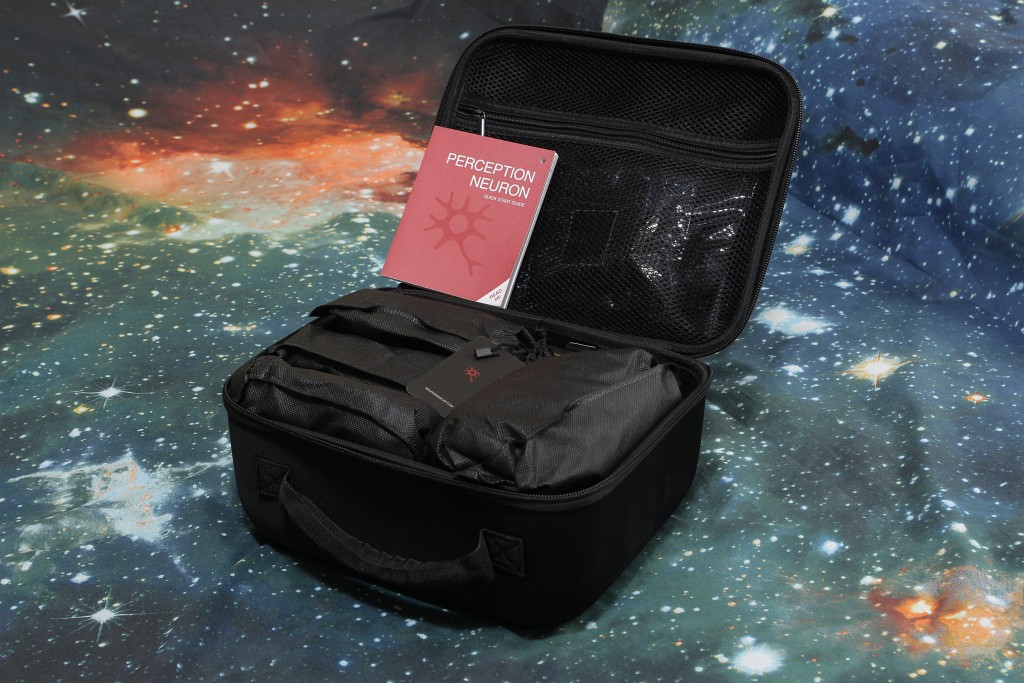
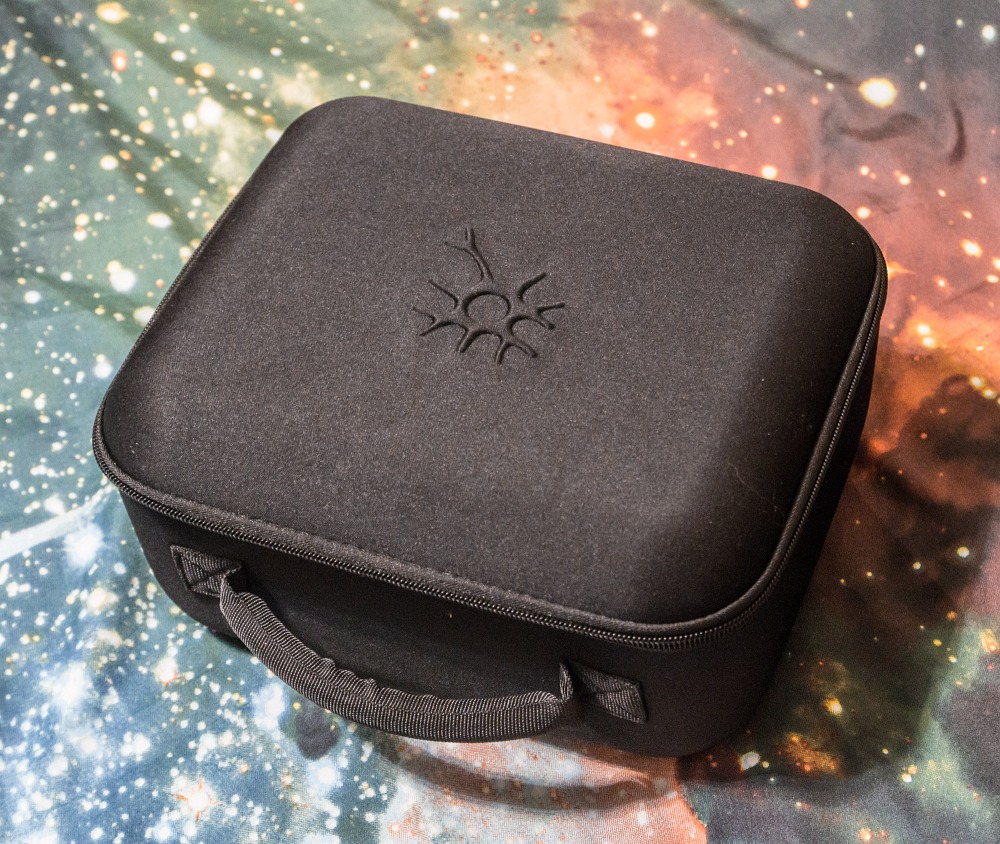
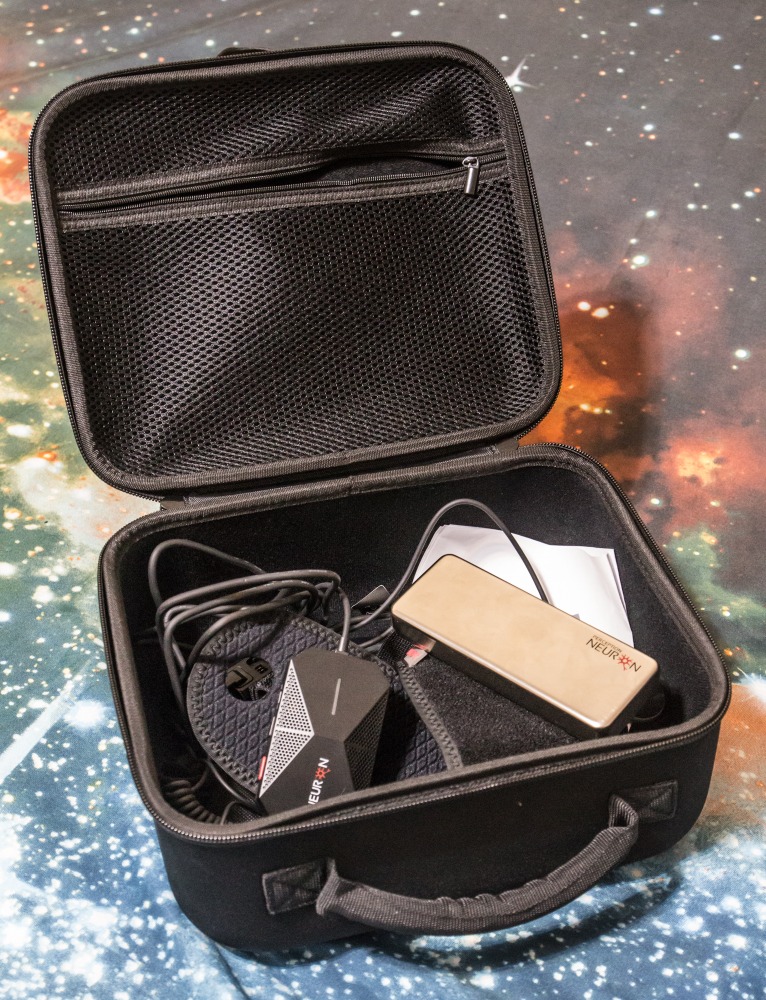
The kit comes with everything you'll need to start capturing right away (apart from a 2-amp USB powerbank you will need to do captures over WiFi).
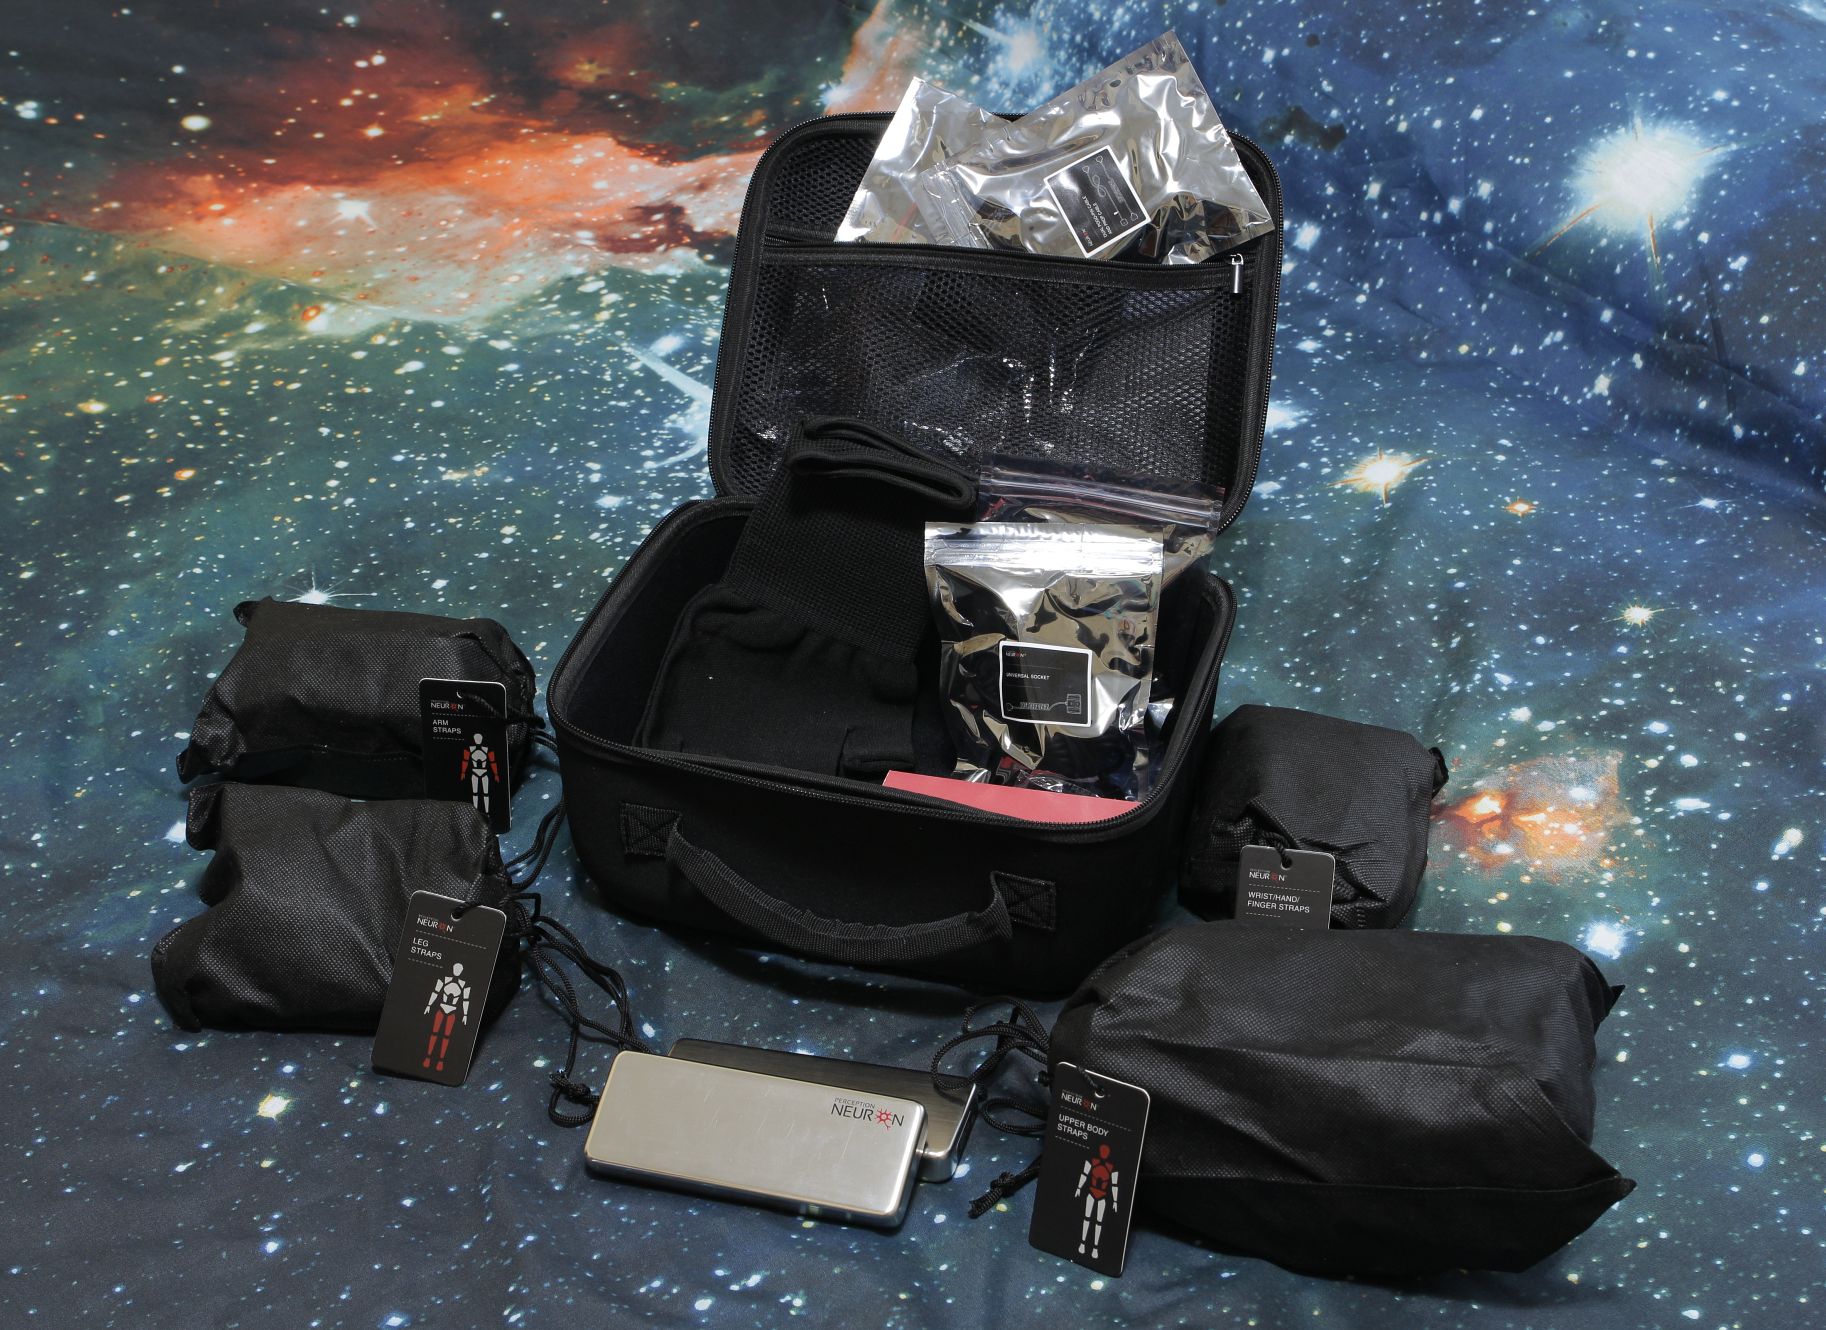
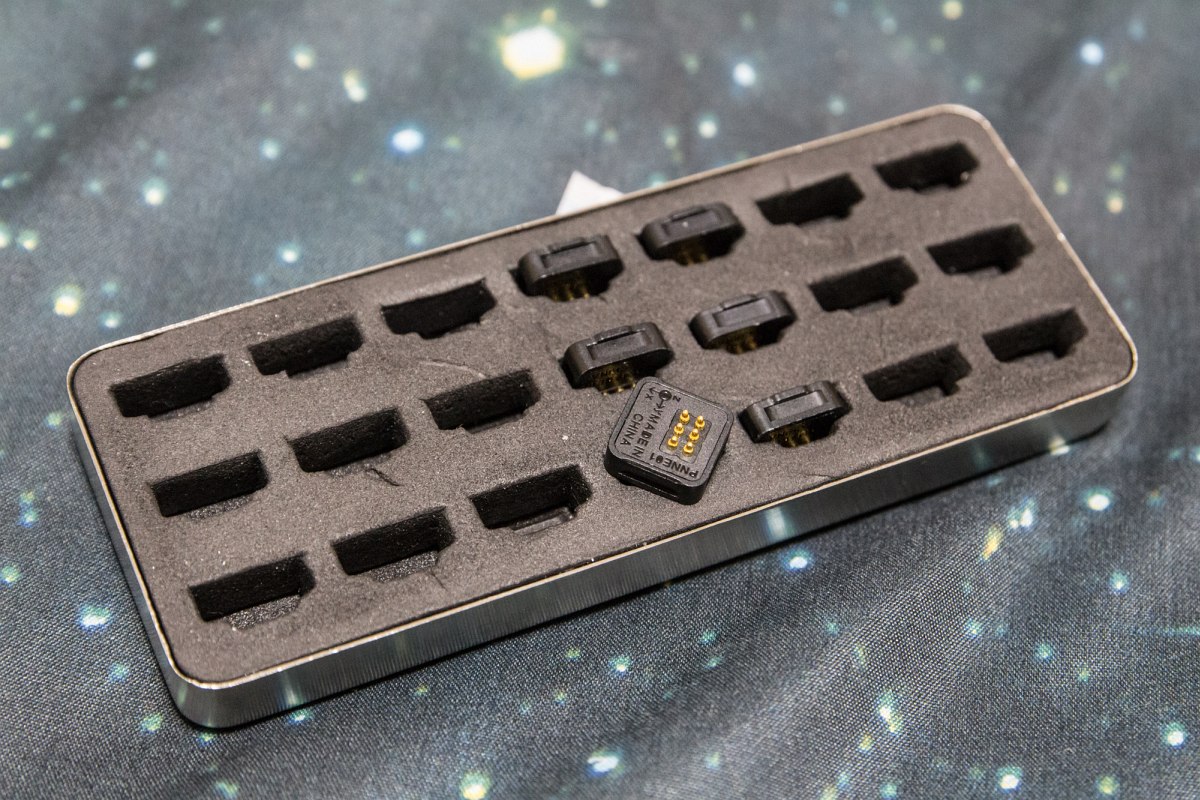
Everything is neatly packed and grouped by the body part. Cool thing is that this is a universal MoCap system. That is, you can only equip certain parts and connect them to the hub and capture, in case you don't need the data from all 32 neurons.
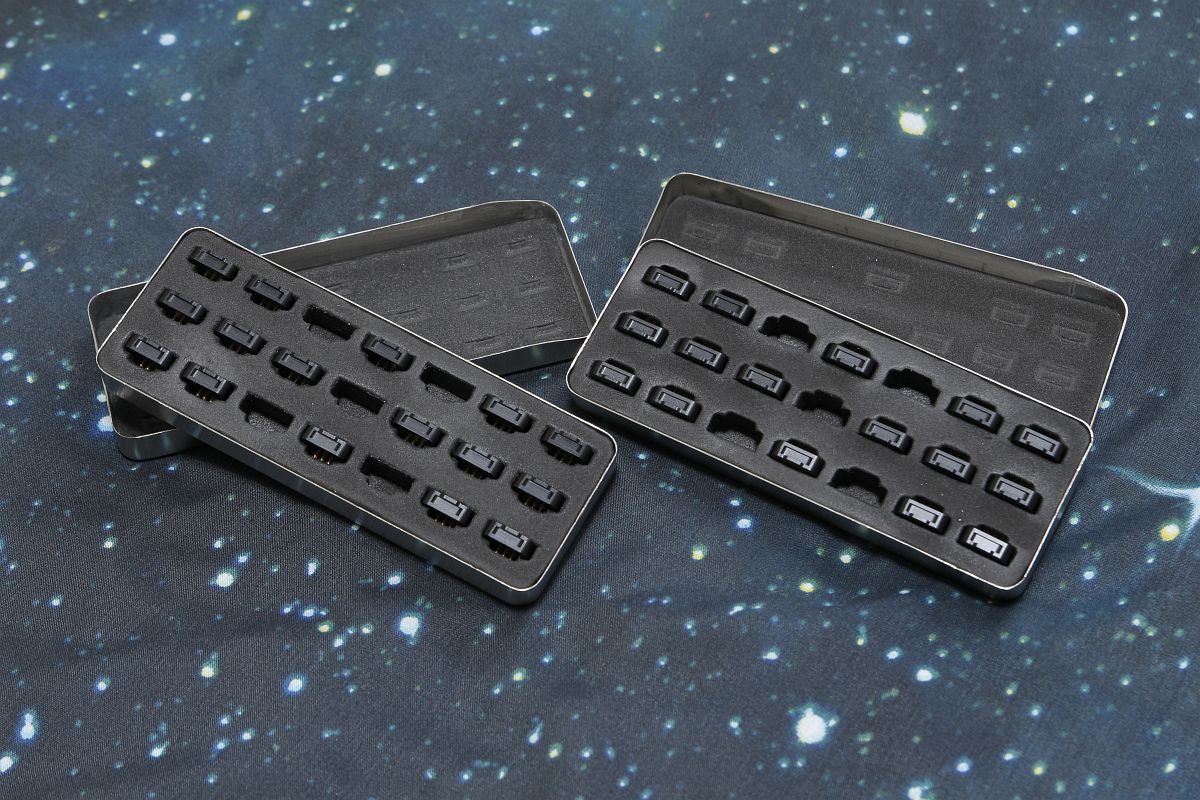 The magnificent neurons
I've also found out that the neurons' cases (not storage cases, actual sensors) are made of aluminum, so they are very sturdy which helps, since you need to pop them in and out every time you put on the suit and take it off respectively.
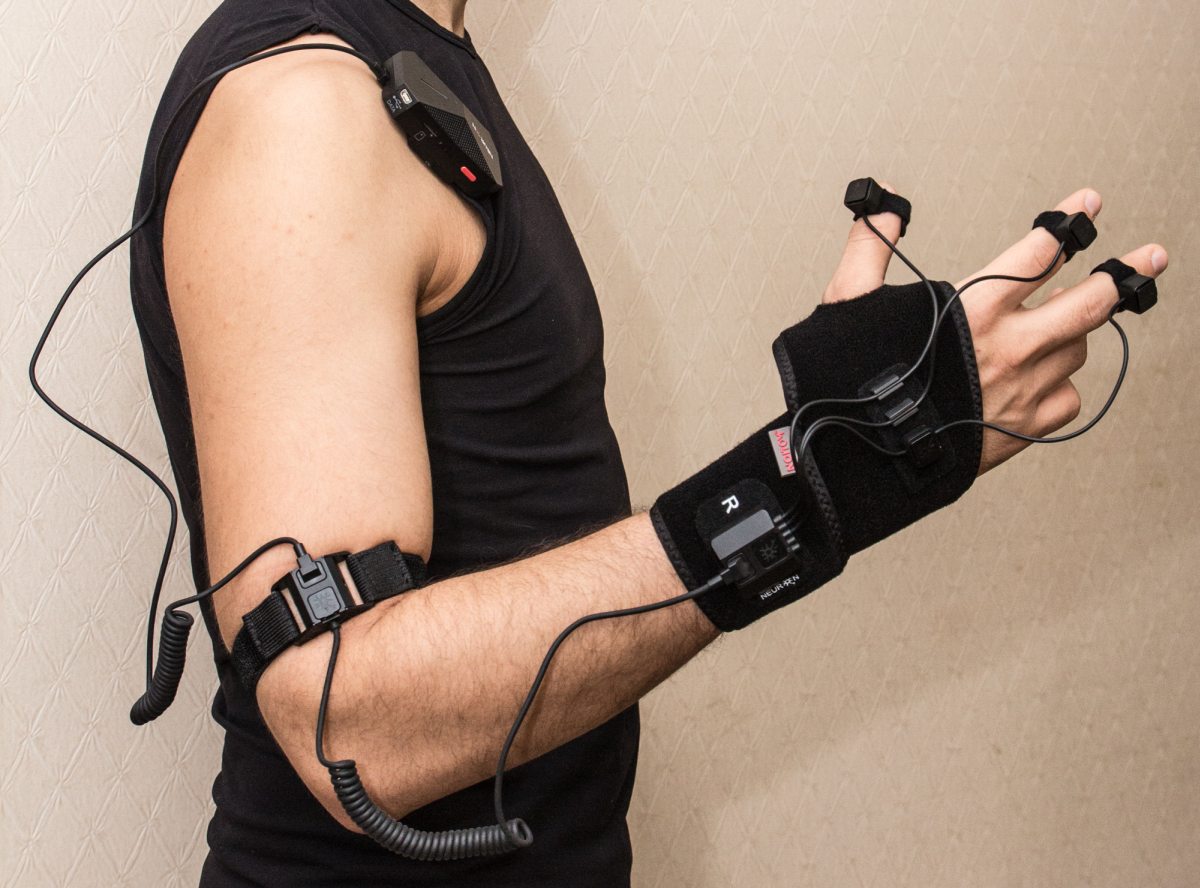
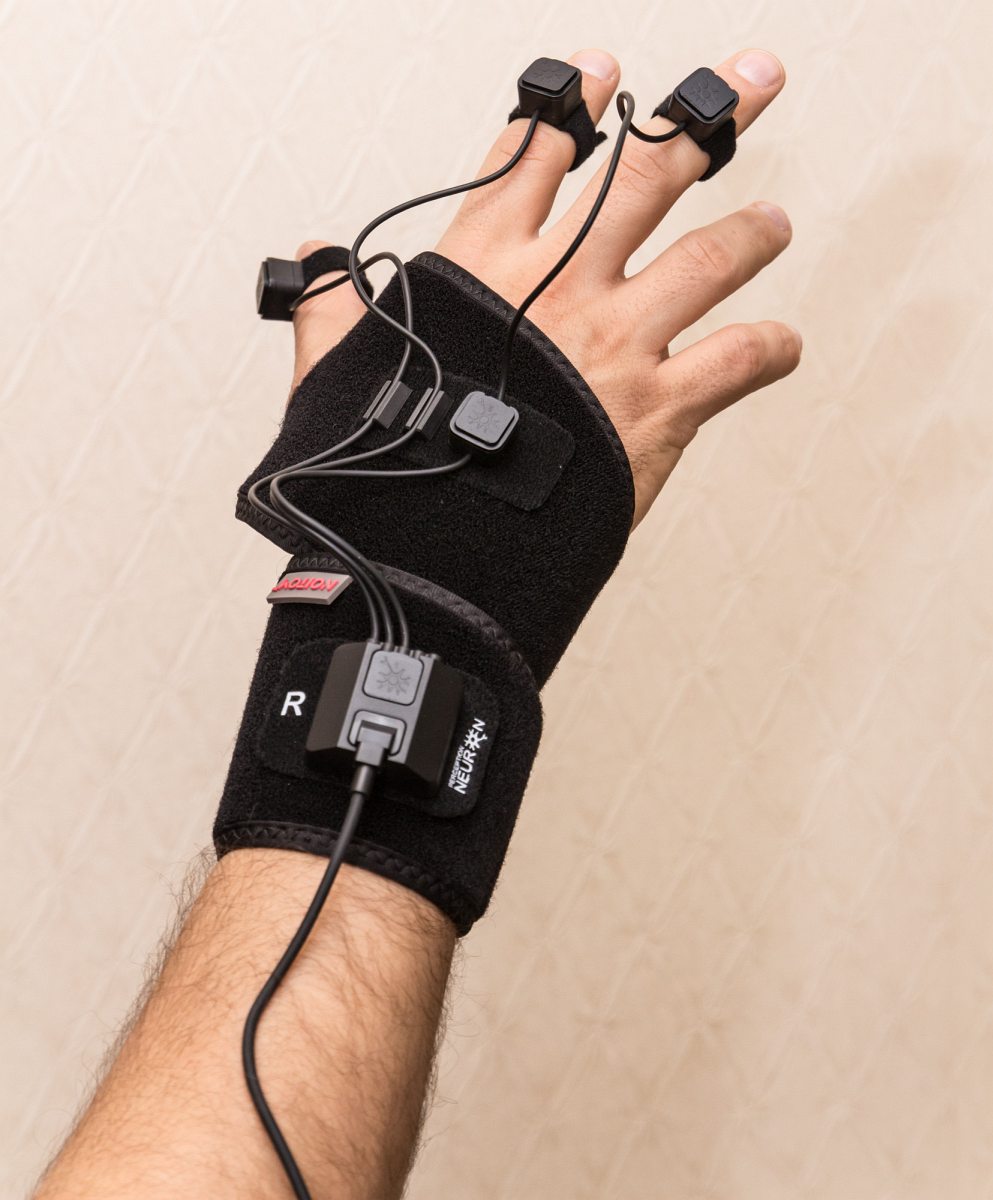
 Does anyone else get the "Minority report" vibe?
I believe the gloves are the highlight of the system:
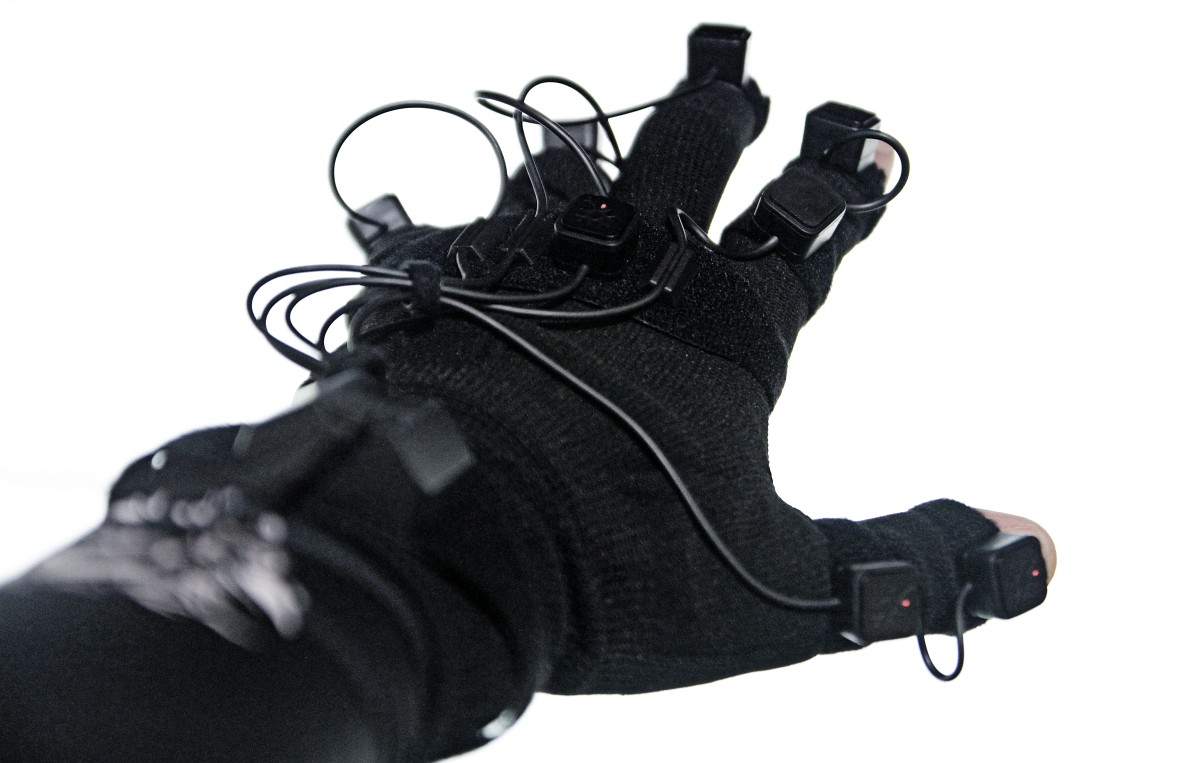 Perception Neuron MoCap gloves
Being able to capture hands is really something! Imagine animating all those digits frame by frame! Granted, captured data is not production-ready off the bat, but it's stable enough you can get to cleaning right away and save tens, no, hundreds of hours on animation!
This saturday I will be doing my very first motion capture session. To satisfy your curiosity while I record and edit the MoCap session video, I quickly put together a couple of short clips I produced while testing the kit.
In the video:
- The very first attempts at capturing and re-targeting raw motion capture data (hence shaky) without any filtering whatsoever.
- Demonstration of how full-body capture with hands and fingers can help tell a story in real-time.
- Finished re-targeting rig and a nuanced finger capture. One-click filtering only.
- Just some random rendered scene.
Note: one of those will probably end up as a very short animation I will do before the main 8-minute film to practice every aspect of a feature production. Try to guess which one it is. =)
Well done, NOITOM, really, really well done... Thank you for making top-quality affordable MoCap available for the masses!

Thank you for reading and stay tuned for more MoCap related posts.
Film production and the upcoming blog post series
As promised, I will do my best to document each and every step of the process of the short animated film production (for archival purposes of course, for no one should ever take some weekend scientist's ramblings seriously).
Therefore, I'm starting a series of blog posts under the "Production" category I will gradually fill with new articles along the way.
Preliminaries
Film production is not a new experience for me. I've produced and directed several short films and a couple of music videos over the years with my trusty line of Canon EOS cameras, starting with the very first entry-level EOS 550D capable of recording full HD 24p video.
It has long been superseded by a series of upgrades and as of today - with EOS 750D with a Cinestyle Profile and the Magic Lantern firmware hack.

I have a bit of practice working the cameras including rentals such as RED and Black Magic, the gear, all kinds of lenses, some steady-cams, cranes, mics and such.


Long story short, I produced a couple of stories, which at some point led me to a series of videos for a client that called for a massive amount of planar and 3D-camera tracking, chroma-keying, rig removal and, finally, an introduction of CG elements into footage. It felt like getting baptized by fire and in the end it was what made me fall in love with VFX and ultimately – 3D CGI.
Now what does this have to do with the topic of pure CG film production?
How and why it's different
In traditional cinema you write the script, plan your shots, gather actors and crew, scout locations, then shoot your takes and edit and post, and edit and post, until you're done. You usually end up with plenty of footage available for editing, if you plan ahead well. This is how I've been doing my films and other videos for a long time.
Animated feature production is vastly different from traditional "in-camera" deal. Even if we're talking movies with a heavy dose of CGI (Transformers, anyone?) it's not quite the same since even in this case you're mostly dealing with already shot footage whereas in CG-only productions there's no such foundation. Everything has to be created from scratch. Duh!
The first CG-only "animation" I've produced up to this day was a trailer for my iOS game Run and Rock-it Kristie:
Here I had to adapt and change the routine a bit, but even then 80% of the footage was taken from three special locations in the game I built specifically for the trailer. So basically the trailer was "shot" with a modified in-game follow-camera rig with plenty of footage available for me to edit afterwards.
In a way it was quite close to what I've well gotten used to over the years.
The process
As soon as you decide to go full retard CG, boy of boy, are you in trouble.
Since I'm not experienced enough in the area of animated CG production I'll give a word to Dreamworks and their gang of adorable penguins from the Madagascar and let them describe in detail what it takes to produce an animated film:
Wow that's a lot of production steps...
So in the long run you are free to create your own worlds, creatures and set up stories and shots completely the way you want them to be, the possibilities are limitless. The pay-off is obviously a much more complicated production process which calls for lots of things one often takes for granted when shooting with a camera: people, movement, environments and locations, weather effects and many more objects and phenomena that are either already available for you to capture on film or can be created either in-camera or on set and in post.
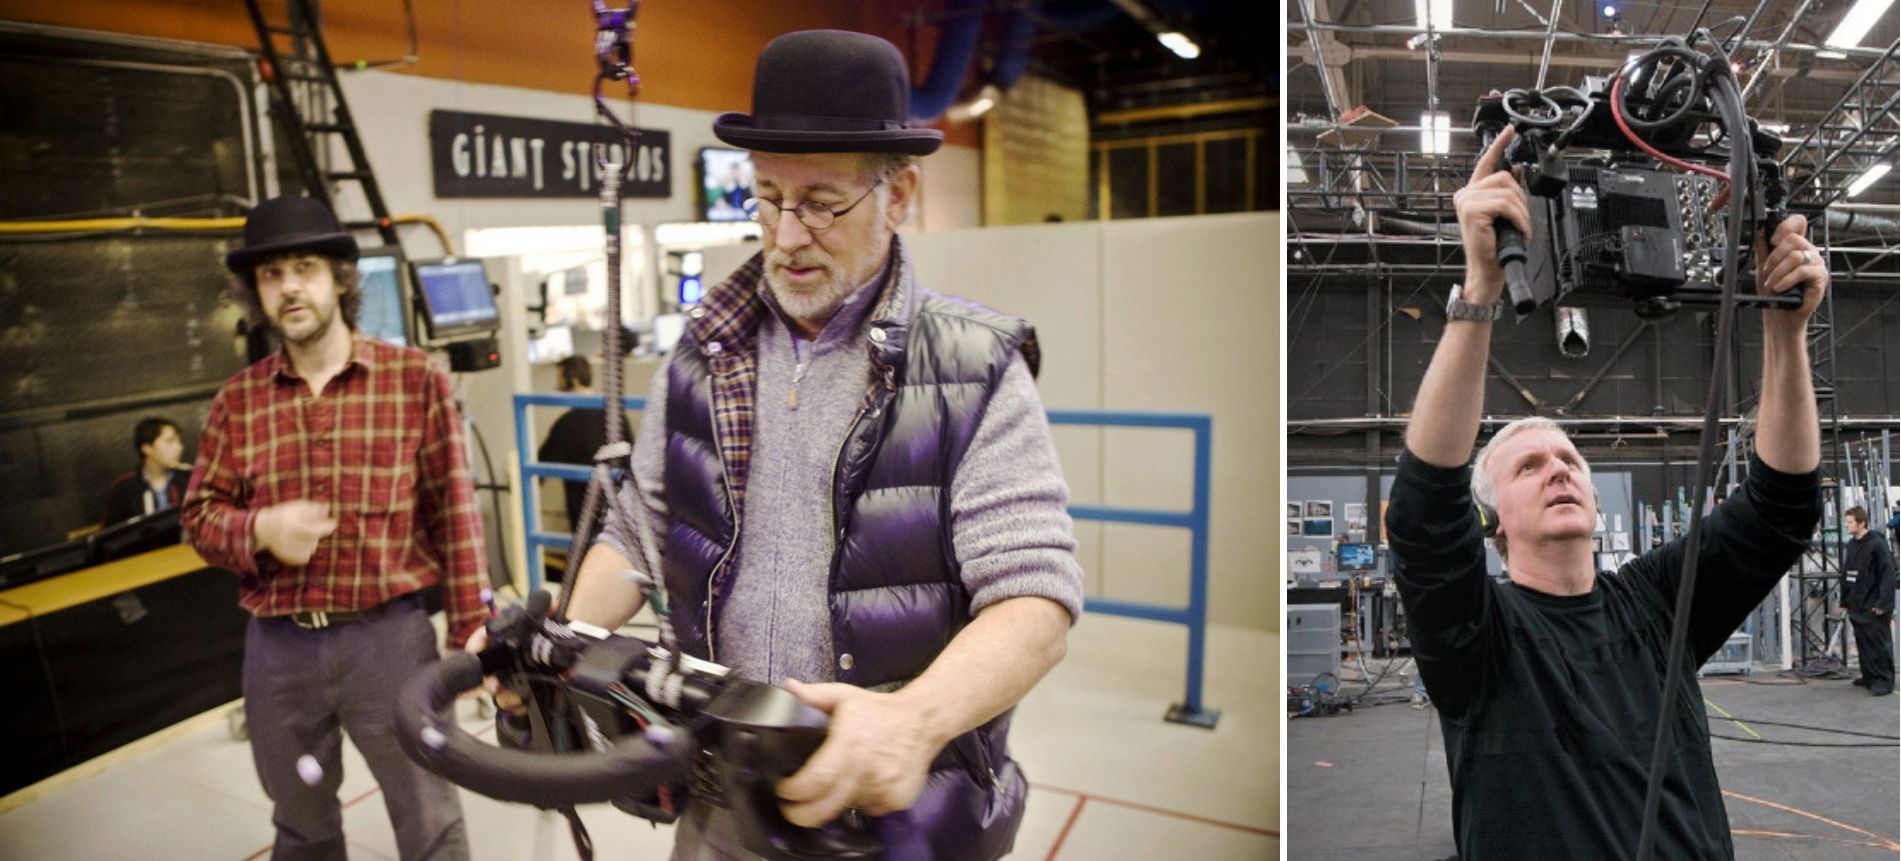
Hell, even when it comes to camera work, if you don't have access to the sweet tech James Cameron and Steven Spielberg use when "shooting" their animated features (Avatar, The Adventures of Tintin: The Secret of the Unicorn, respectively) you'll have to animate the camera in your DCC or shoot and track real camera footage for that sweet handheld- or steadycam-look.
Scared yet?
So, all things considered I should probably feel overwhelmed and terrified at what lies ahead. Right?
Nope.
It's a just a Project. And as project manager I thrive on challenge and always see every complication as a chance to learn new skills and follow each and every project to the end. And this one will be no different.
Thank you for reading and stay tuned!

Quick review and test of the Perception Neuron Lite MoCap system
Noitom specializes in affordable inertial motion capture devices and software, specifically their own line of MoCap systems called Perception Neuron.
Yesterday I finally received my Perception Neuron Lite kit which is a 6-neuron system for those who want to interact with 3D objects in a virtual reality headset or are just looking to try out Perception Neuron before investing into a complete 18- or 32-neuron kits. I was interested in Noitom tech since the first days they started their Kickstarter campaign back in 2014, so it's only natural I jumped the bandwagon and ordered one as soon as the opportunity presented itself.
This is what arrived with the order and what I'll briefly review:
It's important to remember that this is an inertial MoCap system, which means it comes with extremely sensitive sensors which only work in a relatively magnetically safe environment. They are so sensitive in fact, that they come in a special anti-mag container. After use they should always reside inside to make sure they don't magnetize which would render them useless.
Having said that I must admit that I had no issues whatsoever using them even in close proximity to a monitor screen, PC and even my Wi-Fi router. There's also a crazy amount of Wi-Fi networks available all around the apartment so all I can say is – the system worked like a charm even in such non-perfect conditions which was a very pleasant surprise!

Setting the whole thing up was quite intuitive, although I found the manual quite lacking in detail on how to assemble the cables and put it all together. Just a Quick Start Guide and you're kind of on your own.
This particular kit doesn't come with a standard glove but rather some sort of a Velcro strap you wrap around your wrist whilst securing it with your thumb. In fact all non-electric elements or connectors have Velcro strips for placing on top of the base elements.

There's also a semi-interactive manual provided with the Axis Neuron software, but it mostly explains how the system works. Axis Neuron is a specialized app by Noitom designed to record and playback the MoCap data from the Perception Neuron system and it works quite well!

There are two editions: Standard and Pro, the latter costing about 700$ but (in theory) available for free for all Perception Neuron owners. I've contacted support on how to obtain access to the Pro version since it has all bells and whistles including motion smoothing, contact editing and other tools the Standard version is lacking.
UPDATE: Noitom support team replied the very next day with the info on how to receive my copy of Axis Neuron Pro, so now I'm a happy Pro user. Thank you, guys!
After quick set-up and calibration I was actually able to produce a descent take. Here's the raw recording without any smoothing or filtering to showcase what PN is capable of:
All in all, I can definetely say that the system works and can process even relatively fast motion. It will surely come in handy when the time comes to animate the characters in the film, so my next purchase from Noitom will be the 32-neuron full-body MoCap set. Can't wait!