Well, the first motion capture session is over and I finally managed to find time to write a post about this exciting experience. The video of the process is still in progress and I will probably be able to post it after finalizing the 4th and final revision of the previz.
Or not, since it's getting more and more difficult to find time for logging. Go figure.
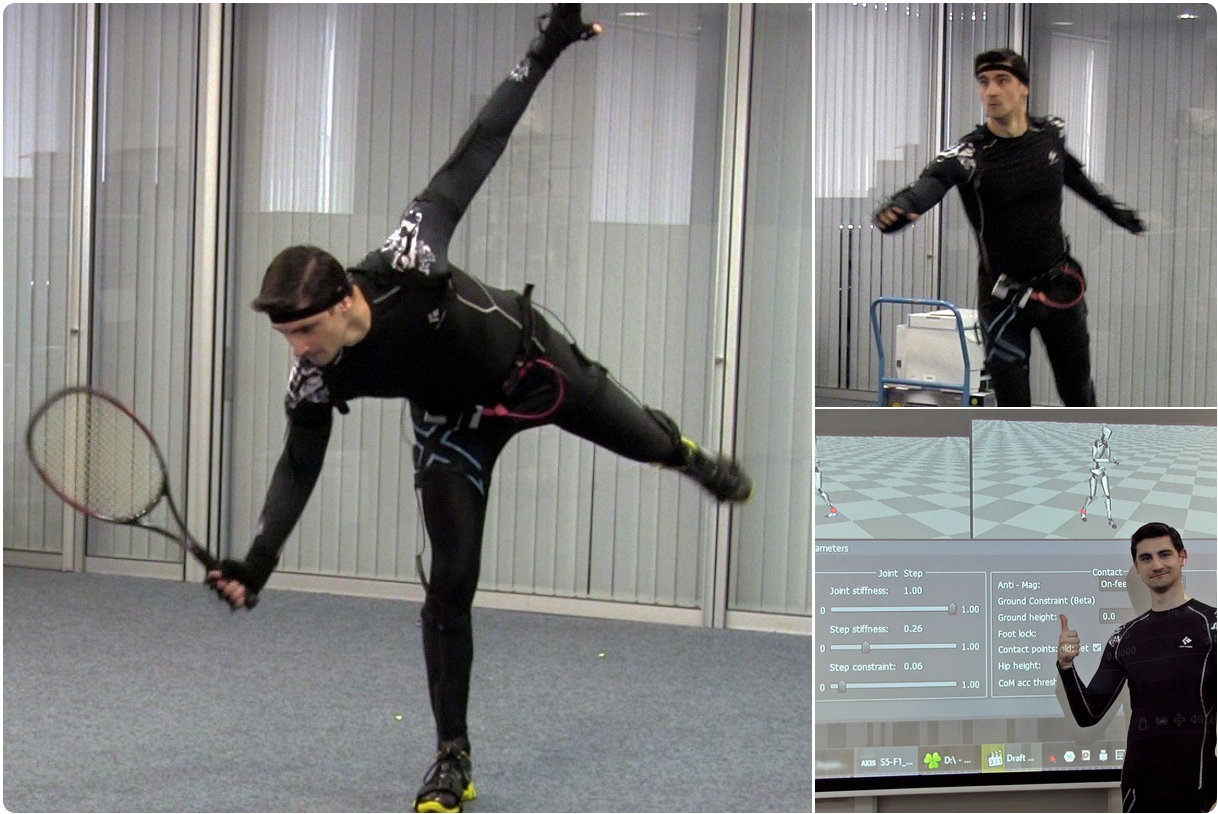
Hence today I'll mostly talk nonsense about the differences between optical and inertial motion capture systems and what pros and cons the latter has compared to traditional optical systems like OptiTrack. It's something I had to study before investing in the full inertial Neuron MoCap kit to make sure I'd get the most bang for my buck when recording action sources for the film.
Optical Tracking Systems
Pretty sure you're familiar with those "classic" motion capture markers used by cameras and specialized software to track each marker's spatial data for transferring calculated translation onto 3D objects or skeletons. If not, here's an excellent article at Engadget to get you up to speed.
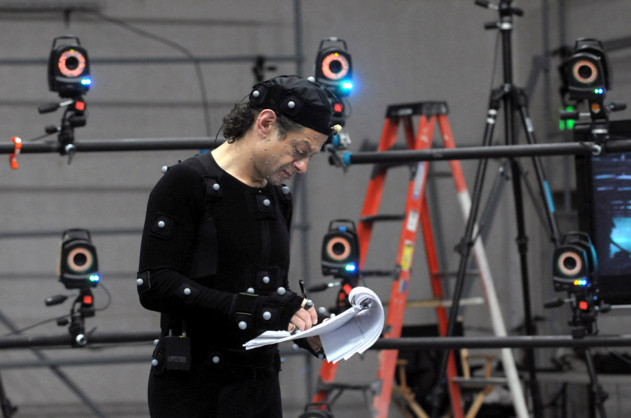 Looking good, Mr. Serkis!
Among optical MoCap solutions OptiTrack is arguably one of the better known ones. The guys at OT aim to provide the most affordable optical MoCap cameras and gear. Here's the simplest setup one would need to capture motion using an optical MoCap system:
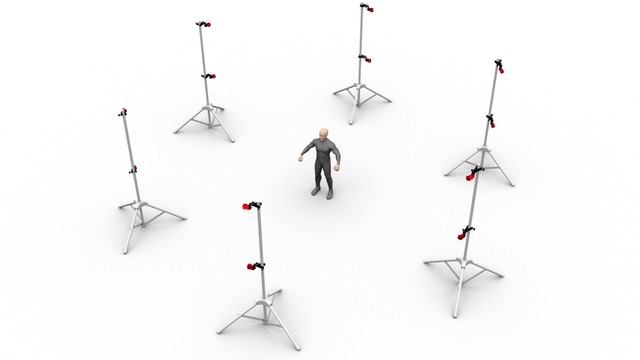 CG Volume visualization from the OptiTrack website
Note how the actor is surrounded by cameras. The more cameras — the better, since as you can guess, body parts can shadow each other, this can make markers invisible to several (if not all) cameras, which in turn means no data.
Obviously, an optical MoCap system's recording volume can be quite limited:
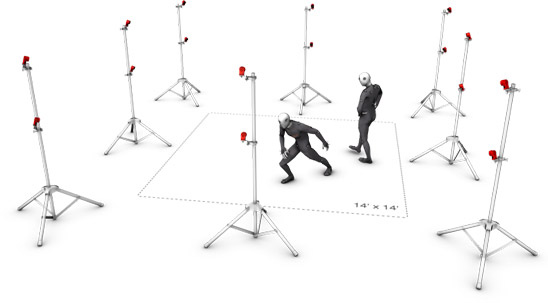 CG Volume visualization from the OptiTrack website
That's why large studios build huge rigs and use top-quality 4K cameras to capture markers in larger volumes:
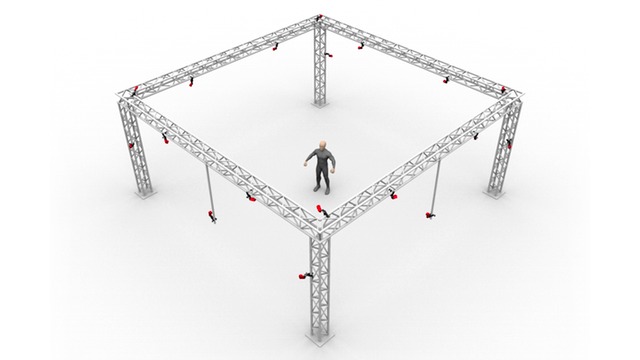 CG Volume visualization from the OptiTrack website
Initially I was actually planning to go the "optical way". Considering that OptiTrack cameras and rigs were (to put it mildly) not very affordable for an amateur, I turned to the iPi Soft Motion Capture software suite which could utilize consumer-grade cameras to do just that, and capture motion without markers (believe it or not). It looked promising and I ended up purchasing several PS Eye cameras (as recommended by iPi devs), tripods, cables to try and capture a clip.
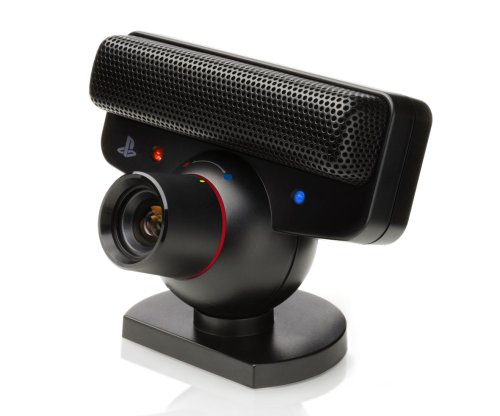 PS Eye Camera
Setting up the cameras and calibrating the recording volume was pretty straightforward, albeit quite lengthy and full of frustrating issues related to both the software and the gear (especially considering that each camera would have to be connected to a full-speed USB port, not a hub/splitter, preferably — 2 cameras maximum per USB controller with a quality USB cable with minimal power loss, good shielding etc.)
Just trust me, it was not fun.
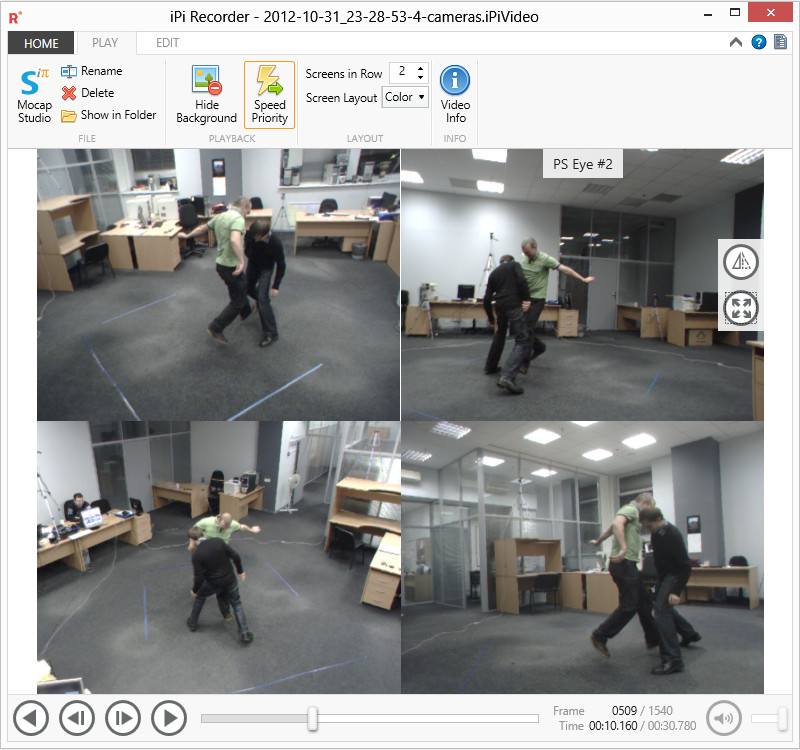
I managed to capture, process and retarget a simple short clip (note: fingers were animated manually since iPi simply can't capture those):
As soon as I was done with this single clip, I quickly realized that guerrilla optical MoCap meant trouble: you need to properly set up the cameras, have lots of actual physical space, space on your hard drive to store high-FPS captures from all cameras, quite a bit of time to set up the rig, calibrate the cameras and mark out the capture volume and so on and so on... Add special lighting conditions (bright and uniform enough) and you'll get the gist of what I'm talking about.
Inertial Tracking Systems
As I already mentioned in my previous blog post, Perception Neuron is an affordable IMU MoCap system. It's a very versatile solution since with the smallest setup possible you only need to be in a relatively magnet-free environment and have a USB power bank to power up the HUB and the sensors to be able to capture animation. Even the use of a computer and a Wi-Fi router is in fact optional since the HUB that comes with the kit supports standalone operation, including calibration and recording, while capturing clips directly to an SD card.
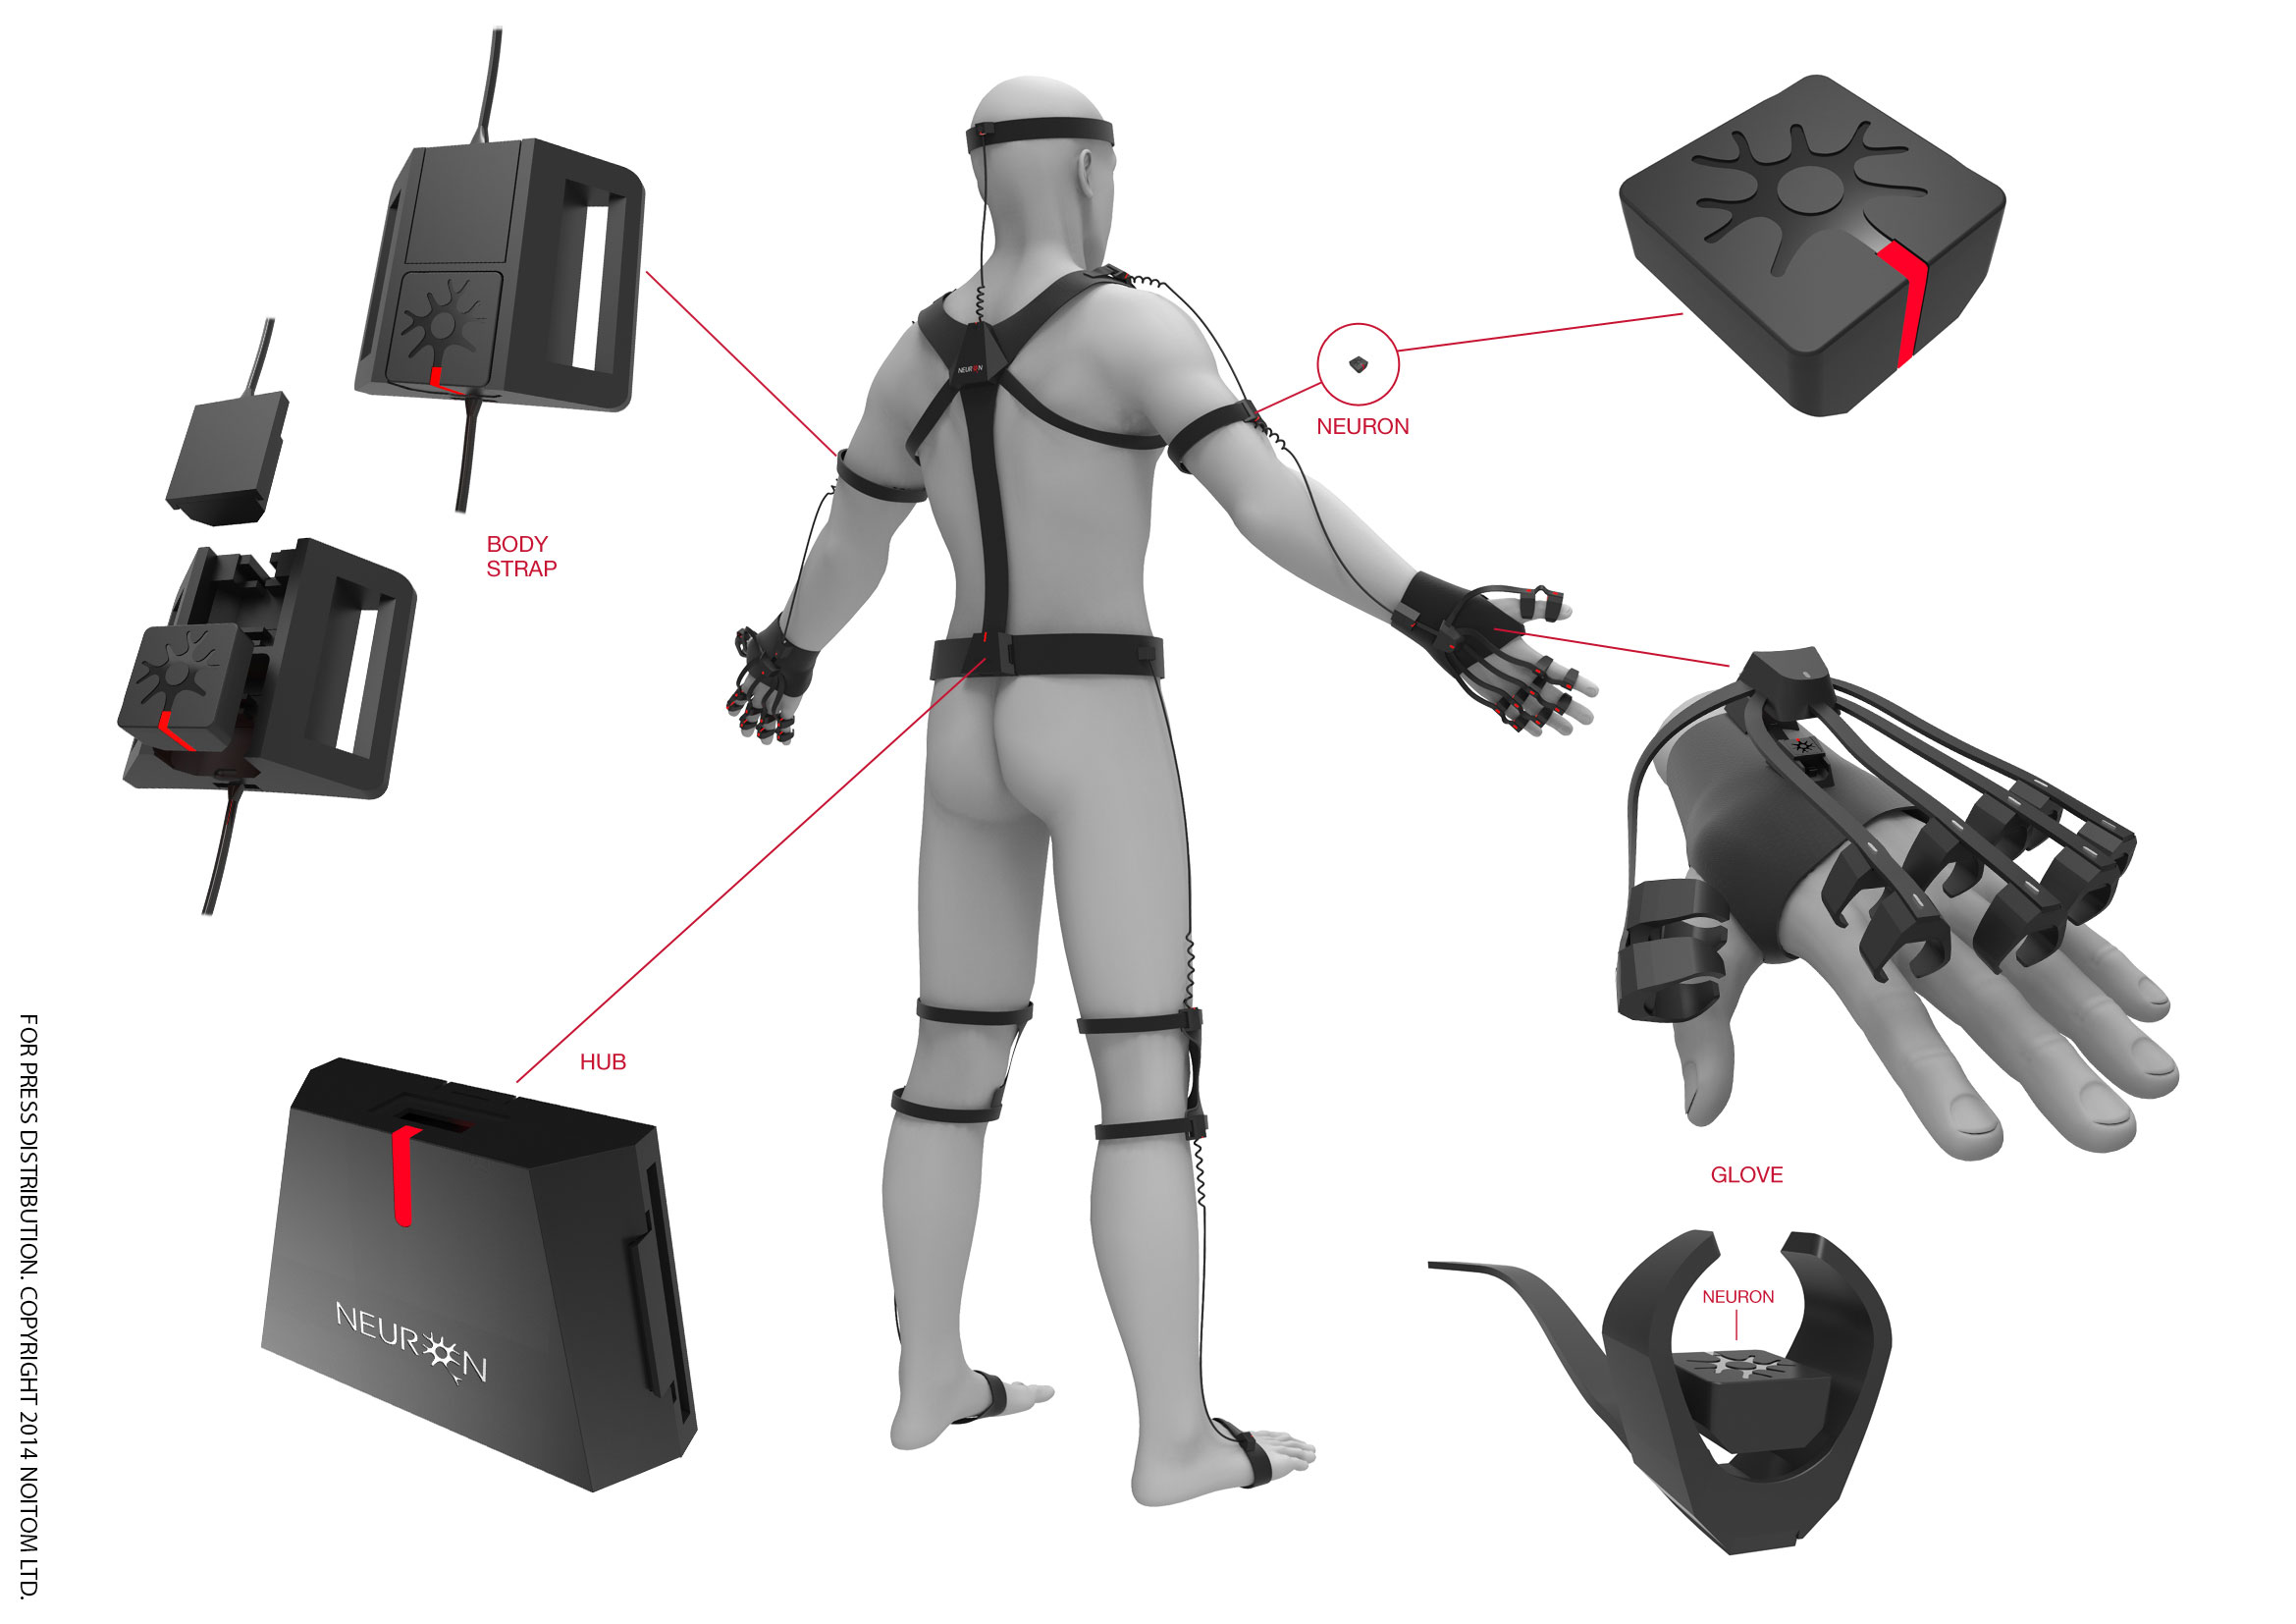
It's all fine and dandy, but what does the use of "IMUs (Inertial Measurement Units)" mean when it comes to motion capture?
Well, by design, IMUs measure force, angular rate, and sometimes the magnetic field surrounding the unit, using a combination of accelerometers, gyroscopes and magnetometers.
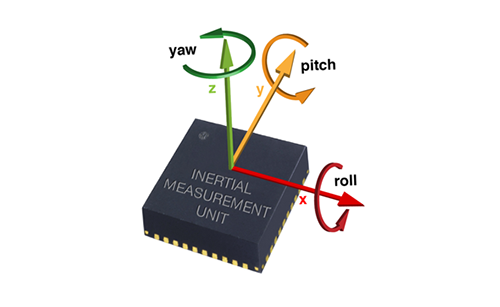
This is a vitally important difference between inertial and optical systems, one you need to clearly understand before going IMU: in the world of a sensor that does acceleration, force and direction there's no such thing as absolute positional data. What this means is that an IMU-based MoCap system has to have a fulcrum (or a pivot/foothold/contact point — the point on which a system rests or is supported and on which it pivots) in order to be able to calculate the difference in absolute positioning of the whole system, not just angular data from the sensors. To put it simply, you need something to support the actor when they move if you want to receive positional data on how the actor (or the whole MoCap system) moves in the scene and even then the data you'll receive will not be 100% precise. This is the main reason all those fancy new HMDs and headsets still use optical tracking to reliably track the wearer in 3D space.
In the case of Perception Neuron, you can use the AXIS Software suite with the following options to specify the contact point mode:
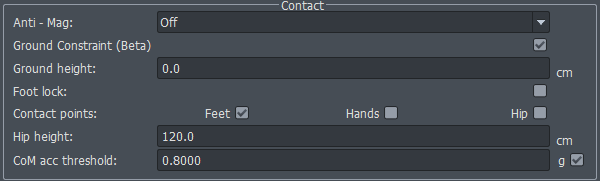
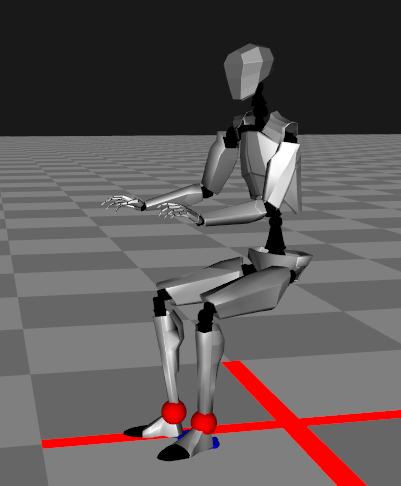
Feet (the mode you will probably be using most of the time):
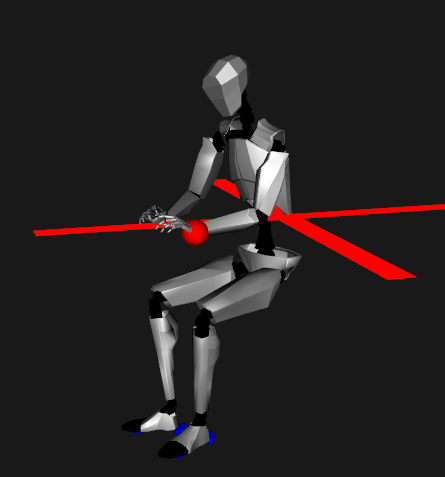
Hands (where the whole rig moves in relation to the detected hand contact, like when hand-walking or hanging onto something):
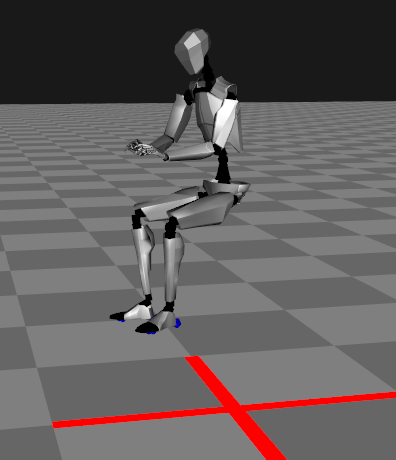
Hip (the actor is actually hovering above the floor while the hip is kept pinned in space):
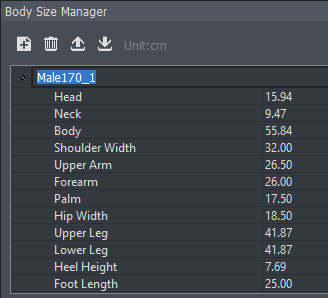
Body size is also quite important for an IMU system because it determines how far the sensors are apart from each other, although based on my experience you can always change body dimensions after recording (the manual doesn't favor this option, but it's still there and works fine):
It's pretty awesome to see the software figure out contact points of a walking or jumping character. Remember that to move in space in an IMU suit you always need to have a fulcrum. Since during a walk your pivot alternates based on the foot that is in contact with the floor, the same principle is used to determine how the IMU system moves in space. Even more impressive is what happens when both feet leave the floor during a jump, for example.
During a jump, the software uses data from the sensors to propel the system in the direction of the jump and corrects the vector on the go with as much precision as the sensors can give. At some point the jump must end with one foot landing on a surface, and this is when the movement is stopped and the whole system gets constrained on the Y-axis:
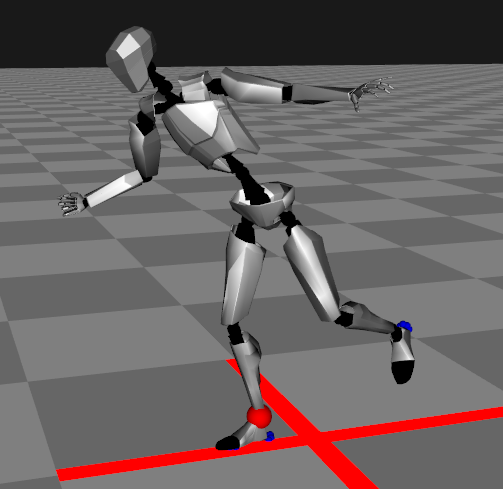 Preparing for a jump. Note the red contact point indicator on the foot and the initial position of the actor
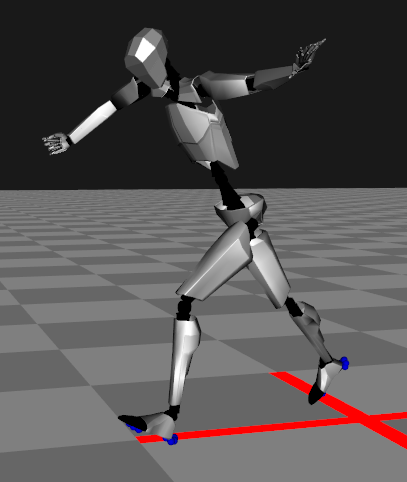 Jumping forwards. The actor is moving in space based on the initial acceleration vector, which changes over time. Note the absence of a foot contact correctly detected by the software
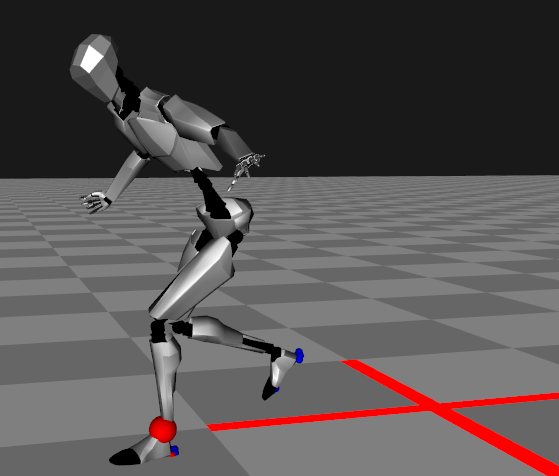 Landing. Note a new contact point detected on the left foot and that the actor has actually moved from the initial position
Think Before You Buy
Keeping all of the above in mind, you can decide whether an IMU MoCap system is right for you or if you can get any use out of it at all, given all the pros and cons of such a solution.
Pros and Cons
Pros of the NOI-TOM Perception Neuron IMU MoCap system:
- Simple-to-use, all-in-one solution: put on the suit, connect, calibrate and capture
- Faster to put on and set up than optical (for the first time, especially)
- Very lightweight and mostly "one-size-fits-all" form factor
- Extremely large recording volume — as far as your Wi-Fi network signal can reach
- A single 5000 mAh USB power bank will last you for a whole day of recording via Wi-Fi
- The kit works just fine over Wi-Fi even via an access point created with an Android phone
- Almost no disconnects and data loss during hours of operation
- Easy and quick calibration
- Only USD 1.5k per a ready-to-use full-body kit which you can use for as long as you wish, time and time again
- Full 32-neuron kit can capture basic finger animation
Cons:
- Inertial, not precise absolute positioning. Such motions as holding your head, clapping, crossing legs will not be 100% spatially precise, and in the resulting recording arms and legs will often interpenetrate which means more cleanup will have to be done in post. IMUs are good for capturing performance but not ideal for 1-to-1 retargeting. They're better suited as a reference or base for handmade animation. Still, for many background characters and motions the recorded clips might require only minimal polishing.
- IMUs are extremely magnetically sensitive, so there's a plethora of tools and hardware you should keep away from the actor. Those are fridges, large motors, computers and other large electric tools which can cause magnetic interference. Otherwise, be ready for lots of swimming and sliding errors in recorded data, both positional and rotational.
- You have to know what motion you're capturing and what part of the rig will serve as a fulcrum. For example, if you're walking, it would be the feet. If you're lying flat on the ground, it's the hip. And if grabbing onto a ledge — the hands. Luckily, you can always change this in post after recording.
- Recalibration is needed after each take with significant motion to zero out rotational errors on sensors
- Each full neuron kit costs about USD 1.5k and you can only capture up to four actors at once in total
- Forget about precise interaction between characters since every character is captured separately, and interaction is prone to the same limitations as a single actor trying to do position-critical movements like holding one's head or clapping — angular and inertial sensors can only provide so much precision.
- Sensors must be stored in a special anti-mag case, which in turn means you will have to pop each of those 20+ sensors in and out of the suit each time you need to set up the system for recording from storage. This is more of a nuisance but it can become frustrating. That's why soon after getting the kit I purchased the larger Anti-Mag case where you can put the whole rig together with sensors and never worry about sensor magnetization during storage, without having to go through the process of removing and inserting those neurons.
- If your sensors do somehow get magnetized, you'll have to go through the process of reinitializing each sensor. It's a somewhat risky procedure (not my words, taken directly from the manual) that you would probably want to avoid. Still, it looks like you can in fact reinit your sensors as many times as necessary, so it's not a "one-time-till-magnetized-then-throw-out" kind of situation, which is good news.
As you can see, IMU systems are by no means perfect and come with numerous limitations you should always be aware of.
Dollar for Dollar
I need to elaborate on the cost of the system and why I finally decided to go IMU. You see, where I live, optical MoCap volume, software and hardware rental can set you back about 800–1600 USD per day (8–10 hours), excluding the actor and processing fees. I knew from the beginning that I'd need at least two days to capture all 170+ takes, which would mean I'd have to be ready to shell out over $1,600–3,200 and be really damn sure I wouldn't miss a single action during capture days since recording additional takes "on demand" would be out of the question.
So would I call PN kits truly affordable MoCap solutions for the masses? Abso-freaking-lutely! There's nothing that can even come close to what you can do with Perception Neuron for the price. Add great support, stable software and reliable operation, and you have the best IMU MoCap kit on the market.
Plan Ahead
Even though I am a complete amateur when it comes to CGI, I am, above all, an experienced project manager, so I made the following table, which I then printed out and used during recording sessions:

Nothing particularly special, but boy, does it help assess the full scale of the project and plan both capture sessions and, later on, retargeting and other actor performance and animation-related tasks.
MoCap Processing
I won't go in depth here since everyone has his or her own routines for working with MoCap, but here's what I had to do to capture and export each action source (i.e., a motion capture recording) for animation reference and retargeting in my DCC:
- Capture the motion with the Perception Neuron kit and AXIS Neuron Pro software
- Import recorded clips into AXIS Neuron Pro, choose the best takes, fix contact points where necessary, configure smoothing and other parameters for each take
- Export each take as a BVH file
- Import the exported BVH data into DCC (in my case: Softimage) and extract the BVH action clip for retargeting
- Retarget the animation to a character rig using either default retargeting tools or, in my case, a constraint-based retargeting setup
- Set up basic offsets for the center of mass, feet and anything else before plotting the animation
- Plot the animation onto the character rig and export it in the application's native animation format to be used directly in the animation mixer
- Import the resulting clip into a scene and apply it to the character
- Set up offsets, sync character and camera animation
- Rinse and repeat 170+ times
Frankly, I didn't expect it to be so time-consuming, but most of the steps are similar for all captures, so I was able to rather quickly process all takes through step 8. All that is left is to actually make use of all those captures in the film's scenes, which I've already started doing and it's going well.
It's a Long Way To Go
If you think that directing, capturing, processing, retargeting and correcting 170+ MoCap actions is quite a formidable task, you're 100% correct. Still, I got myself into this mess and I'll be the one to get through it and, hopefully, make it look good in the end.
Only time will tell.